info@c-tech-implant.com +39 051 66 61 817 + 49 721 60 95 32 38

    • Italiano
    • English
    • Deutsch
    • Español
    • Français
    • Русский
    • 中文 (中国)
    • Türkçe
    • Ελληνικά
    • Magyar
    • Српски језик
    • Lietuviškai
    • Bahasa Indonesia
    • Slovenčina

Slide Mission, Internazionale, Garanzia, Certificazione, prodotti Compatibili

Clinical cases

Immediate dental implant placement & immediate aesthetics on a upper lateral incisor

Written by feRKzzCTo0 on . Posted in Catarina G. Rodrigues, Clinical cases, Conventional Implantology, Immediate loading, Manuel D. Marques

Catarina G. Rodrigues, DDS, MSc – Manuel D. Marques, DDS

In the present clinical case, the upper left lateral incisor presented with a vertical fracture. Following a proper clinical and radiographic analysis, the tooth was considered hopeless. The treatment plan consisted of the extraction of the lateral incisor and immediate dental implant placement. It is well described in the literature that delayed loading, in contrast with immediate or immediate- delayed loading, can lead to predictable results in all clinical situations.

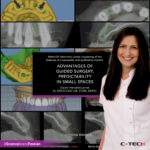
Advantages of guided surgery, predictability in small spaces

Written by feRKzzCTo0 on . Posted in Clinical cases, EL – Esthetic Line, GS – Guided Surgery, Guided Surgery, Henriette Lerner

by Doctor Henriette Lerner, HL-DENTCLINIC DR. STOM. MEDIC.

In this case, the patient has a genesis of the two upper lateral incisors.
Having created the space with the help of the orthodontic specialist, we first proceed with a Digital Smile Design and then with the digital planning of the two implants in comparison with the new aesthetics.

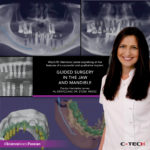
Guided surgery in the jaw and mandible

Written by feRKzzCTo0 on . Posted in Clinical cases, EL – Esthetic Line, GS – Guided Surgery, Guided Surgery, Henriette Lerner

by Doctor Henriette Lerner, HL-DENTCLINIC DR. STOM. MEDIC.

In this case, it is necessary to use all the digital tools available – detection of joint movements, digital smile design and guided surgery, with the aim of having predictability and accuracy. For the future aesthetic part and function, the evaluation took place before the surgery.

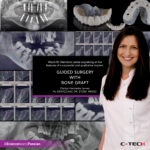
Guided surgery with bone graft

Written by feRKzzCTo0 on . Posted in Clinical cases, EL – Esthetic Line, GS – Guided Surgery, Guided Surgery, Henriette Lerner

by Doctor Henriette Lerner, HL-DENTCLINIC DR. STOM. MEDIC.

In this case it is shown how it is still possible to work in guided surgery and consequently perform bone grafts where necessary.
The advantage in a difficult case like this is to design the dental implants with a surgical guide, in order to maintain their correct positioning.
Finally, the aesthetic project was evaluated prior to surgery.

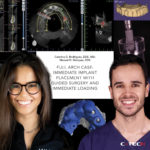
Full arch case: immediate implant placement with guided surgery and immediate loading

Written by feRKzzCTo0 on . Posted in Catarina G. Rodrigues, Clinical cases, Full arch, GS – Guided Surgery, Guided Surgery, Immediate loading, Manuel D. Marques, MUA

Catarina G. Rodrigues, DDS, MSc – Manuel D. Marques, DDS

A 57-year-old woman presented to a private practice with the chief complaint being “I’m self-conscious about the appearance of my teeth. Also, I’ve lost most of my teeth and I cannot eat well because of that”. The clinical and radiographic examination revealed the absence of all teeth except the central incisors and right lateral incisor in the upper. In the lower, partial edentulism, severe bone loss, and multiple periapical infections were diagnosed. Also, the patient’s function and aesthetics were seriously compromised (Fig 1-11).

3-unit Bridge over Implants using Guided Surgery and One Time Concept

Written by feRKzzCTo0 on . Posted in Catarina G. Rodrigues, Clinical cases, Conventional Implantology, GS – Guided Surgery, Guided Surgery, Manuel D. Marques, MUA, ONE TIME Clever Concept

Catarina G. Rodrigues, DDS, MSc – Manuel D. Marques, DDS

A 30-year-old man presented to a private practice with the chief complaint being “I want to replace the teeth that are missing on my upper jaw”. The clinical and radiographic examination revealed the absence of teeth #24, #25, and #26 (Fig. 2,3). Following a proper diagnosis, the treatment plan proposed was the placement of two implants, followed by the placement of immediate final abutments at the same time of the surgery (One Time Clever Concept, C-Tech Implant). The planned final prosthesis consisted of a 3-unit bridge over implants.

One Time Clever Concept: Non-removal of immediate abutments in a single crown and 3-unit bridge over implant

Written by feRKzzCTo0 on . Posted in Catarina G. Rodrigues, Clinical cases, Conventional Implantology, EL – Esthetic Line, Immediate loading, Manuel D. Marques, ONE TIME Clever Concept

Catarina G. Rodrigues, DDS, MSc – Manuel D. Marques, DDS

A 67-year-old female patient presented to a private dental office with pain on the first quadrant. The clinical and radiographic examination revealed extensive caries and a history of root canal therapy failure on teeth #1.3 and 1.5. Also, absence of teeth #1.4 and #1.6 (Fig. 2-4).

Full-mouth implant rehabilitation with two different abutment systems: Multi-unit and Omni system

Written by feRKzzCTo0 on . Posted in Bone Regeneration, Catarina G. Rodrigues, Clinical cases, Conventional Implantology, EL – Esthetic Line, Esthetics, Full arch, GS – Guided Surgery, Guided Surgery, Manuel D. Marques, MUA, OMNI

Catarina G. Rodrigues, DDS, MSc – Manuel D. Marques, DDS

A 66-year-old man presented to a private practice seeking a fixed restoration to replace his terminal dentition. The intraoral and radiographic examination revealed partially edentulous arches, the presence of periapical infections and extensive carious lesions on several teeth, significant attachment loss, and tooth mobility (Fig.1-3).

Both aesthetics and function were compromised. The vertical dimension of occlusion was reduced due to loss of posterior support and excessive wear. Following a proper diagnosis, the treatment plan proposed was the extraction of all the remaining teeth, placement of five implants in the maxilla and six implants in the mandible, immediate loading of the implants, and – as final restorations – full arch screw-retained prosthesis (Fig.4).

In order to perform proper pre-surgical planning of the case, initial records of the patient were obtained: intra and extra-oral photographs, digital impressions, and CBCT. A 2D facially driven digital smile design was made to aid in the planning of the position and dimension of the teeth for the future interim prosthesis.

Then, using a specific 3D CAD software, a digital diagnostic wax-up was generated and 3D printed. A silicone index was obtained from the 3D printed model and filled with bis-acryl resin to produce trial restorations and evaluate the 2D smile planning on the patient’s mouth (Fig.5-7).

The approved try-in was then scanned and superimposed with the preoperative intra-oral scan and CBCT to digitally plan the implant surgery. Once the future implant positions were defined, they were translated into the design of the surgical templates (Fig.9-10).

The prosthetic abutments were also planned in the same software as the implants.
Due to the patient’s systemic conditions, was decided to perform first the upper surgery and 3 months after the lower one. In the upper arch, after extraction of all maxillary hopeless teeth, implant sites were prepared through the guide according to a specific drilling protocol, and using C-Tech guided surgery kit, followed by implant placement.

All implants were torqued with at least 45Ncm to ensure enough primary stability for immediate loading. After implant placement, multi-unit abutments were inserted and torqued in place with 25 Ncm. A full arch provisional screw restoration was delivered the same day (Fig.8).

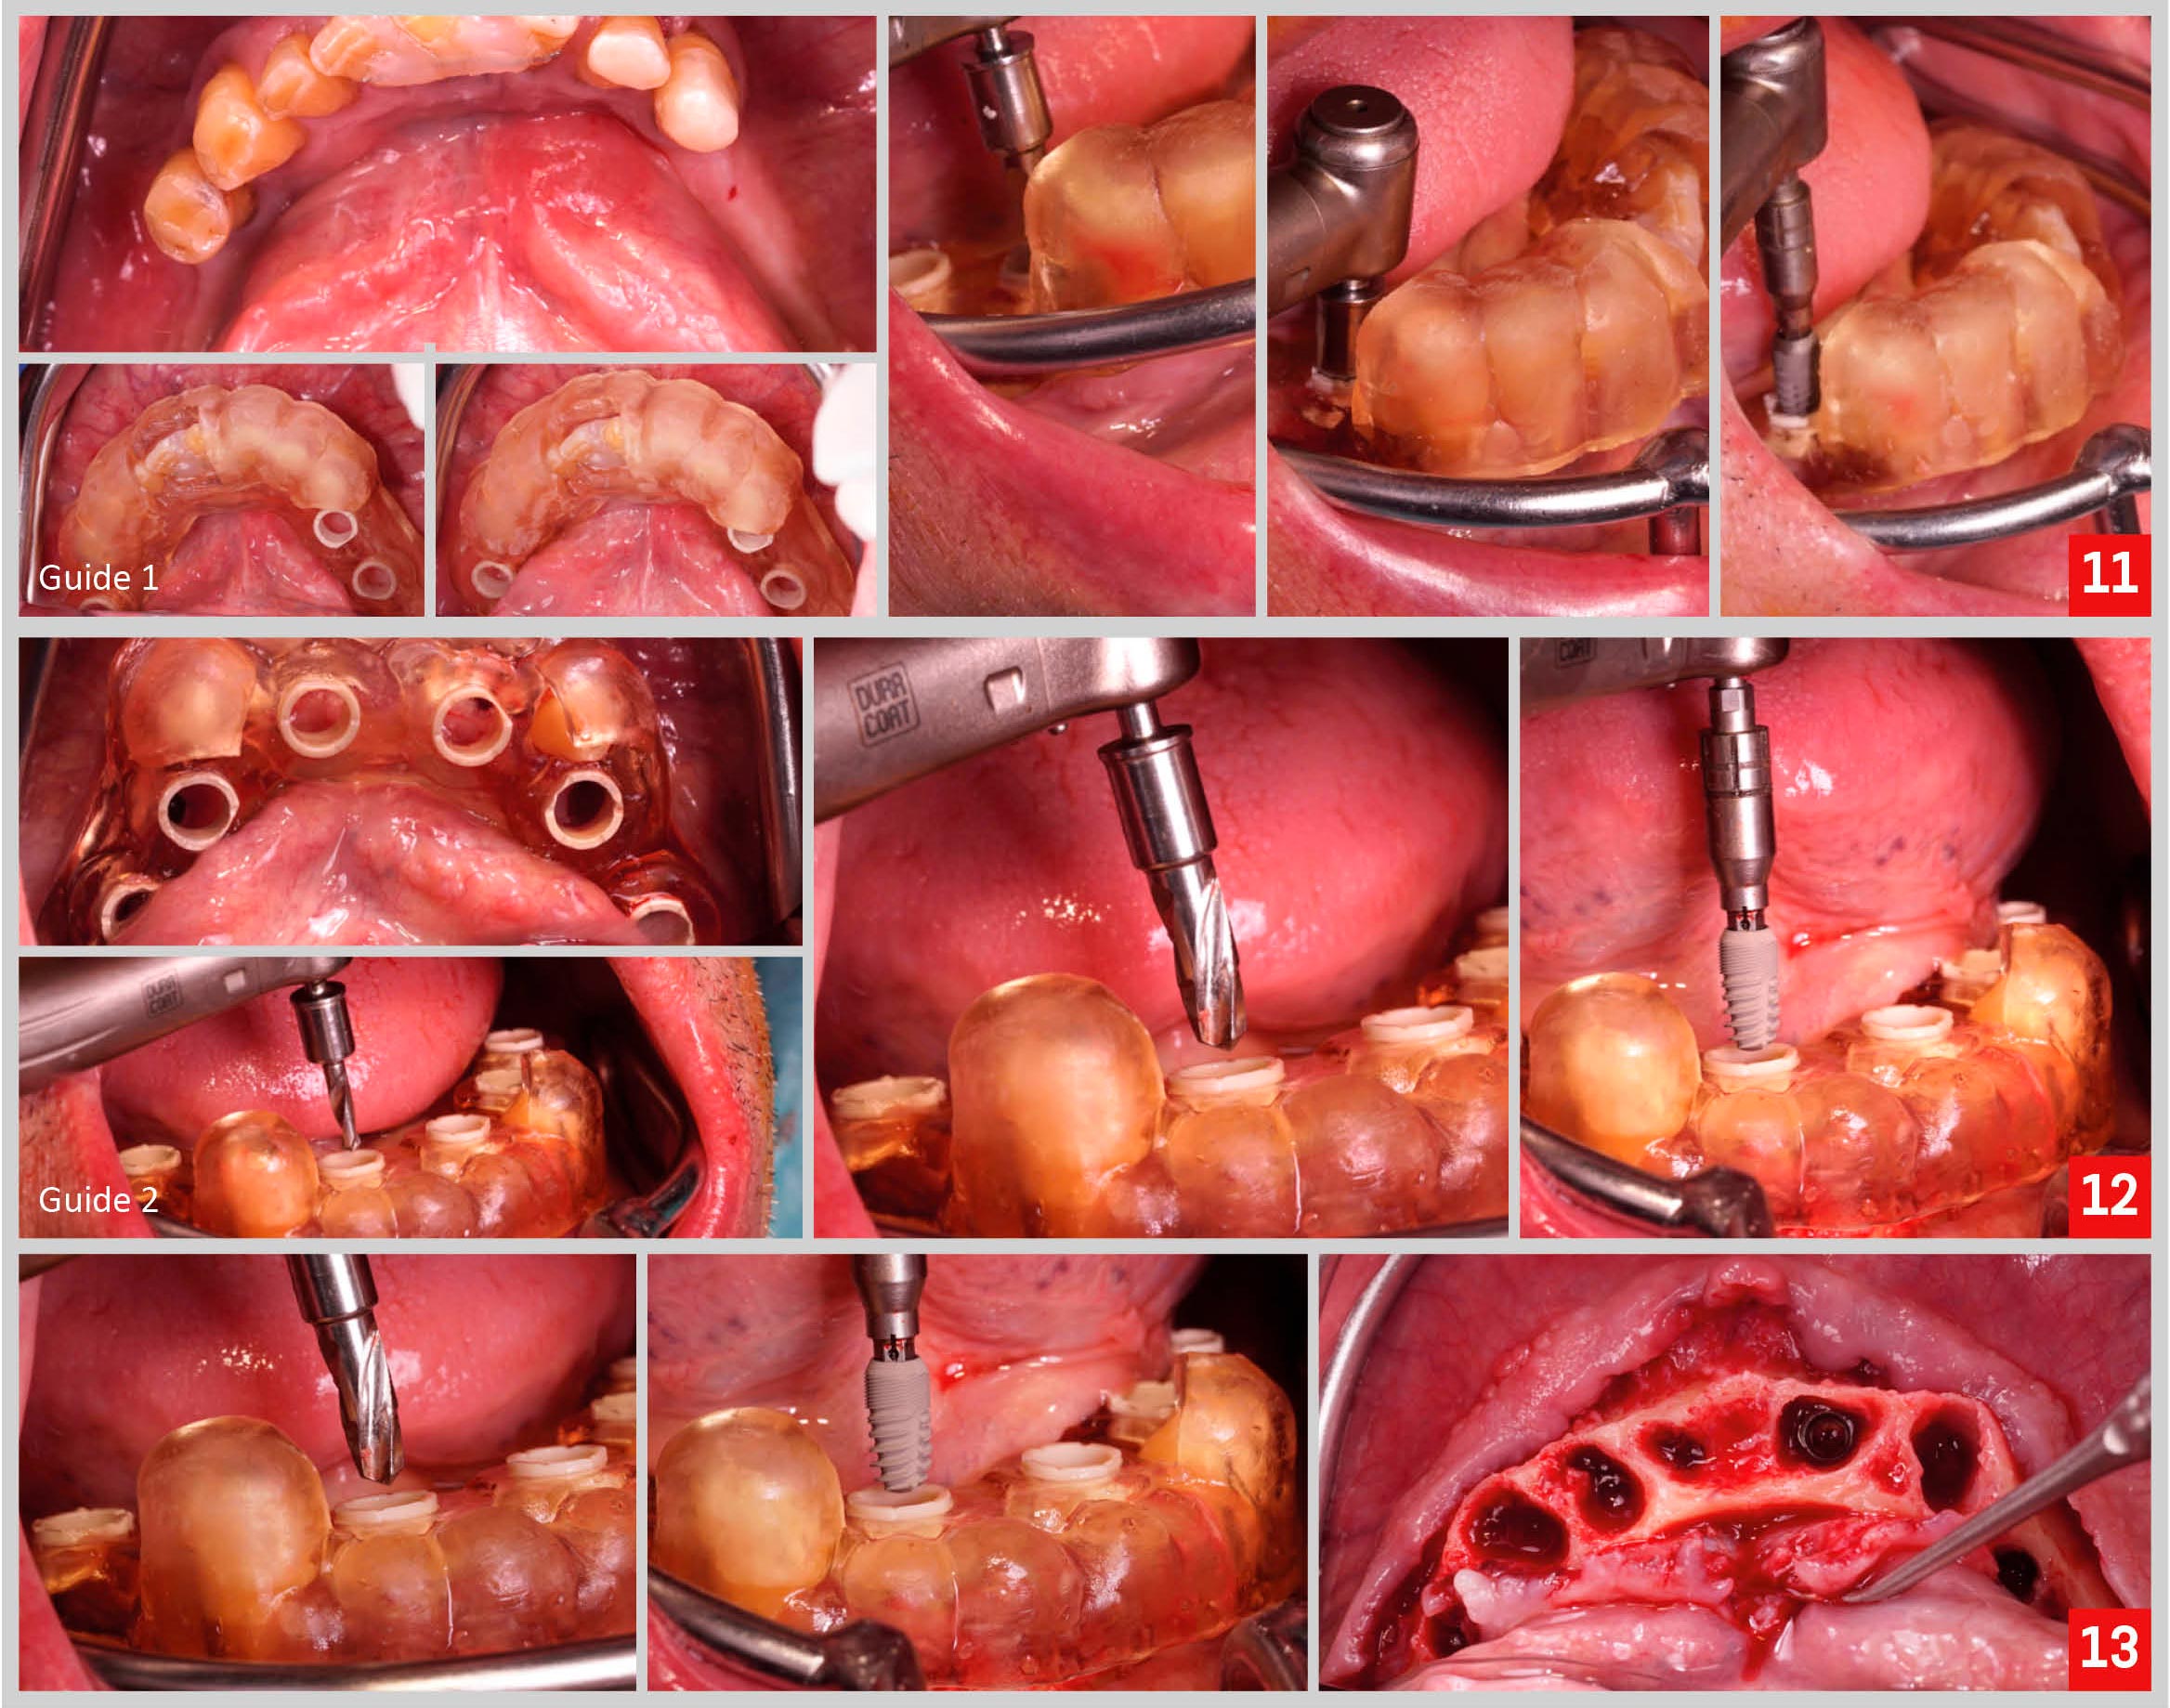
The implant surgery in the mandible was carried out 3 months after. To improve the precision of lower implant surgery, two surgical guides were used to place the implants.

The first guide was placed before any extraction and used to place implants on the molars region and right premolar region. Then, the first guide was removed, all teeth but the canines were extracted, and the second guide was seated and used to place implants on the anterior and left premolar regions (Fig. 11-13).

After implant placement, Omni system abutments were inserted and torqued in place with 25 Ncm. A full arch provisional screw restoration was delivered the same day. Post-op periapical x-rays and a panoramic x-ray were taken to ensure proper adaptation of the interim prosthesis to the implant abutments. Intra and extra-oral pictures of the immediate prosthesis were obtained (Fig. 14-19).

Three months after the lower, and six months after the upper surgery and immediate loading, we proceed with final impressions. In an occlusal view, after removing the lower fixed provisional prosthesis, we can appreciate a healthy appearance of the soft tissue (Fig. 20,21).

Finally, we deliver a full arch screw retained fixed prosthesis over multi-unit abutments in the upper arch, and a full arch screw retained fixed prosthesis over Omni system abutments in the lower arch (Fig. 22-25).

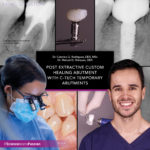
Post extractive custom healing abutment with c-tech temporary abutments

Written by feRKzzCTo0 on . Posted in Bone Regeneration, Catarina G. Rodrigues, Clinical cases, Conventional Implantology, EL – Esthetic Line, Esthetics, Manuel D. Marques

Dr. Catarina G. Rodrigues, DDS, MSc – Dr. Manuel D. Marques, DDS

One of the main challenges during implant treatment is adequate maintenance of peri-implant soft tissues. This will have a tremendous influence on the longevity of the implant, and aesthetics of the final implant-supported restoration.

In some clinical situations, the shape of pre-fabricated healing abutments is not adequate to obtain a proper emergence profile, as they differ from the shape of the natural tooth. That will happen most of the times when placing immediate implants, right after a tooth extraction.

The use of a custom healing abutment, not only will preserve the natural soft tissue architecture, but will also, later on, facilitate the work of the restorative dentist and lab technician on the fabrication of the final crown, as the soft tissue is already developed to accept a crown with a natural size and contour (Fig. 1).

The present clinical case illustrates how to obtain a custom healing abutment using a temporary metal abutment and light-cured flowable resin composite (Fig. 2,3).


For this clinical situations, there are mainly three reasons for choosing a metal abutment over a peek one. First, the metal connection is stronger. Given the fact that we will need to screw and unscrew the abutment several times, by using an abutment with a stronger implant connection there is less risk of deforming it. Second, the surface characteristics and design of the metal temporary abutment facilitate the process of adding and retaining the resin composite. Lastly, when using the temporary metal abutment it is possible to confirm with a periapical x-ray the position of the abutment on the implant, while with peek abutments that will not be possible.

The patient presented with complaints on tooth 4.6. After a proper clinical and radiographic examination, a large apical cyst was found, besides signs of failed endodontic treatment, extensive structural loss and multiple cracks (Fig.4,5).


Given that the tooth was considered to have an unfavorable long-term survival, extraction and immediate implant placement was recommended as the ideal treatment plan.

The surgical procedure consisted of atraumatic extraction of tooth 4.6, followed by immediate implant placement (Fig.6,7).

Then, a temporary metal abutment was screwed on the implant and the flowable resin composite was attached to the abutment, creating a “spider web” to help on reproducing the shape of the extraction socket to the design of the custom healing abutment (Fig.7).


Then, the abutment was unscrewed (Fig.8), more flowable composite was add, within the limits previously defined, to create a proper emergence profile (Fig.9), and the finishing and polishing procedures were undertaken (Fig 10-12).


Finally, the socket was filled with a xenograft bone substitute and the custom healing abutment was screwed on the implant. No sutures were necessary as, due to its shape, the abutment itself closed the socket completely (Fig.13-15).


At one week post-operative control appointment we could appreciate a proper healing of the tissues (Fig. 16).

Three months after implant placement, we proceed with the final impressions. After removing the custom healing abutment, we can observe the maintenance of soft tissue contour thanks to the shape of the abutment itself (Fig.17,18).


The final impressions were done digitally using an intra-oral scanner. The scanner allow not only the record of the implant position, but also, of the soft tissue anatomy, with great detail (Fig 19,20).


The final crown was fabricated fully digitally in monolithic zirconia. At the time of crown delivery, we could appreciate, in an oclusal view, a proper gingival thickness, and in a lateral view, a very natural soft tissue contour and maintenance of the interdental papilla (Fig. 21,22).

Guided immediate implant placement and immediate loading in the esthetic zone

Written by feRKzzCTo0 on . Posted in Catarina G. Rodrigues, Clinical cases, Conventional Implantology, EL – Esthetic Line, Esthetics, GS – Guided Surgery, Guided Surgery, Immediate loading, Manuel D. Marques

Dr. Catarina G. Rodrigues, DDS, MSc – Dr. Manuel D. Marques, DDS

A 50-year-old woman presented to a private practice very unhappy with the aesthetics of her smile. The patient said that her front teeth were always misaligned, but recently they had worsened considerably. In the initial extra-oral photographs we can note that the right central incisor is excessively inclined towards the buccal side and also extruded (Fig.1,2).

The initial intra-oral pictures revealed wrong tooth proportions and the presence of several spaces between the upper anterior teeth, which obviously compromised the aesthetics of her smile (Fig. 2-5).

The radiographic examination revealed that the bone support of tooth 1.1 was very compromised. Also, clinically we detected grade II mobility (Fig. 6,7).

Following a proper diagnosis and given the fact that the patient asked for a minimal invasive approach, we proposed the following treatment plan: prophylaxis, direct composite restorations on teeth 1.2, 2.1 and 2.2, to help managing the interdental spaces and improve aesthetics, extraction of tooth 1.1 with immediate implant placement and immediate loading, and finally a ceramic crown over implant (Fig.8).

To perform a proper planning of the case, several records of the patient were obtained. Besides intra and extra-oral pictures, we did also full arch IOS impressions and CBCT (Fig. 9).

Since the original position of tooth 1.1 was not correct, this tooth was digitally extracted on the STL file and a 3D wax-up of a new central incisor with correct position, and proportions was digitally made to aid on the planning of the position and dimension of the future implant.

Then – using a specific software to plan the guided surgery – the STL files from the initial scan, the 3D wax-up and the CBCT were all superimposed, allowing the planning of the implant position accordingly to the planned future restoration (Fig.10).

At the time of the surgery, tooth 1.1 was extracted using an atraumatic technique not to damage the bone or the soft tissues (Fig. 11,12).

After that, the stability and adaptation of the guide were checked, followed by guided preparation of the implant site according to a specific drilling protocol and using C-Tech guided surgery kit. (Fig.13,14).

Finally, the implant was inserted through the guide and a connective tissue graft was preformed (Fig. 15-17).

The immediate fixed provisional restoration was made with a titanium provisional abutment and the patient’s own tooth. The root of the extracted tooth was cut and prepared to be bonded to the titanium abutment. Then, the provisional crown was finished and polished (Fig. 18,19).

The 1-month follow-up appointment revealed very good healing and adequate aesthetics of the interim prosthesis. Also, on the periapical x-ray we can note the subcrestal position of the implant, ideal for the aesthetic zone once it allows proper emergence profile of the implant restoration and helps with long-term aesthetic stability (Fig. 20,21).

While we waited for the osseointegration of the implant, we proceeded with the direct composite restorations of teeth 1.2, 2.1 and 2.2. We selected the shade of the composite resin and then completed the direct restorations under rubber dam (Fig. 22-24).

Later, 3 months after the implant surgery, we proceeded with the final impressions. To help the lab technician with the reproduction of the critical and subcritical contour of the provisional crown, I scanned first the provisional on the mouth and then the provisional crown alone (Fig 25).

Finally we delivered the final restoration, a screw-retained layered zirconia crown over implant (Fig. 26-28).

When comparing the initial situation of the patient and her final pictures, we can appreciate an important improvement on the aesthetics of her smile (Fig. 29-31).

Narrow implant in the upper jaw, 8-year follow-up

Written by feRKzzCTo0 on . Posted in Clinical cases, Conventional Implantology, EL – Esthetic Line, ND – Narrow Diameter, Peng Dong

Doctor Peng Dong, the expert of tooth implantation in Peking University International Hospital and president of Beijing Hedu Stomatological Clinic Co., Ltd

Medical Case Report

Sex / Age: Female/36  
First Visit: 08/11/2014 Implant Surgery: 08/07/2015
Others Surgery (GBR…): 17/12/2014 Final Restoration: 19/03/2016
First Recall: 26/03/2016  
Chief Complaint: Missing upper anterior teeth, the patient seeks implant restoration.
Consideration(s): On-lay Bone Graft

CASE OUTLINE

Upper left teeth 1 and 2 were extracted due to trauma three months ago. The patient is in good health and has no other contraindications for surgery. Oral examination: Upper left teeth 1 and 2 are missing, with significant alveolar bone resorption. The mucosa shows no signs of redness or swelling. Teeth 1 in the upper right, 3 in the upper left, and 2 to 2 in the lower jaw are free of caries, stable, and the gums show no redness or swelling. The relationship between the upper and lower front teeth is deep overbite, class I. The overall oral hygiene is good, with no calculus, pigmentation, or soft plaque deposits. The gum tissue is firm and resilient, and there is no bleeding upon probing. CT scan results: The width of the alveolar bone for tooth 1 in the upper left is 3.6mm, with a height of 15.6mm. For tooth 2 in the upper left, the width is 1.5mm, with a height of 14.5mm, and there is a 13mm gap.

TREATMENT PLAN

In the initial phase, a 1.5cm*1.0cm segment of the right lower 8 cheekbone will be harvested and transplanted to the left upper regions 1 and 2 using an on-lay bone graft technique. After a period of six months, conventional implantation of C-Tech implants will be performed, with models EL-3509/ND-3011, one each. Following a three-month interval, temporary restorations will be created. Subsequently, after five months, impressions will be taken for the fabrication of permanent restorations using zirconia-based porcelain crowns.

TREATMENT

1. Under routine electrocardiogram monitoring, drape the area with disinfected cloths. Administer painless local anesthesia to the upper right tooth 3 to the upper left tooth 4.
2. Make incisions along the crest of the alveolar ridge for teeth 1 and 2 in the upper left region. Make a reduction incision on the cheek side for tooth 3 in the upper left region. Carefully reflect the gingiva and observe good bone healing, then remove the fixation screws.
3. For teeth 1 and 2 in the upper left region, create tapered boreholes measuring 3.0mm and 2.6mm, respectively. Implant C-Tech implants (Model: EL-3509 and ND-3011) with closure screws. Apply a torque of 25N for tooth 1 and 20N for tooth 2, and securely suture the area. Place sterile gauze rolls to control bleeding. Instruct the patient on post-operative care, including a 3-day course of oral antibiotics and rinsing with chlorhexidine mouthwash four times daily for two weeks.
4. Remove sutures after 10 days, confirming good wound healing with no redness and swelling in the soft tissues and presence of some soft plaque.
5. After 8 months, take an impression and replace the restorative abutment with Model: EL-4502F and ND-3025-2. Permanently fix it with adhesive fixation, and apply an oxidized zirconia porcelain crown for long-lasting restoration.

DISCUSSION

1. The patient is satisfied with the current condition of their teeth, and the dentures function and appear excellent.
2. There is no pain, abnormal sensation, infection, or damage observed after the implantation.
3. During the clinical observation period, there was no evidence of gum recession.
4. X-ray findings during the observation period indicate that the bone resorption around the neck of the implants in the left upper regions 1 and 2 is less than 0.2mm.

2 short implants restoration in the lower jaw, 6.5-year follow-up

Written by feRKzzCTo0 on . Posted in Clinical cases, Conventional Implantology, EL – Esthetic Line, Peng Dong

Doctor Peng Dong, the expert of tooth implantation in Peking University International Hospital and president of Beijing Hedu Stomatological Clinic Co., Ltd

Medical Case Report

Sex / Age: Female/74  
First Visit: 14/07/2014 Implant Surgery: 15/01/2015
Others Surgery (GBR…): Final Restoration: 19/06/2015
First Recall: 17/01/2015  
Chief Complaint: Missing a posterior tooth in the lower left region, the patient seeks implant restoration.
Consideration(s):

CASE OUTLINE

The lower left posterior tooth has been missing for several years. It will undergo restoration using two C-Tech implants (Model: EL-4307). A subsequent application of oxidized zirconia full crowns is planned for final restoration.

TREATMENT PLAN

For the lower left sixth molar, with a width of the alveolar bone measuring 6.8mm and a height of 10.2mm, the proposed treatment plan involves the implantation of a C-Tech implant (EL-4307). Similarly, for the lower left seventh molar, with a width of the alveolar bone measuring 6.2mm and a height of 9.8mm, the proposed treatment plan also includes the implantation of a C-Tech implant (EL-4307) using conventional techniques.

TREATMENT

1、Perform standard disinfection and drape the area with cloths. Administer local anesthesia to the regions of the lower left teeth 5, 6, and 7.
2、Make incisions along the crest of the alveolar ridges of the lower left teeth 6 and 7. Create an incision inside the groove of the lower left fifth tooth. On the cheek side of the lower left tooth 7, make a distant and central reduced tension vertical oblique incision. Carefully reflect the gingiva to expose and smooth the bone surface.
3、Precisely position the C-Tech implants (Model: EL-4307) in the locations of the lower left teeth 6 and 7. Use pilot drills to reach the working length and gradually prepare the boreholes to 3.9*9mm. Collect autogenous bone for grafting and implant the C-Tech implants (EL-4307) with closure screws. Apply a torque of 60N for the lower left tooth 6, achieving a marginal bone height of M3/D1.5/B1/L1, and apply a torque of 60N for the lower left tooth 7, achieving a marginal bone height of M1.5/D1/B1/L0. Place autogenous bone on the cheek side and neck of the lower left implants 6 and 7. Securely suture and control bleeding.
4、After 5 months, take an impression and replace the restorative abutments with Model: EL-4502F/2. Perform an oxidized zirconia full crown restoration, fixating it with adhesive fixation for permanent restoration.

Full arch on bridges, upper and lower jaws, with a 7-year follow-up

Written by feRKzzCTo0 on . Posted in Bone Regeneration, Clinical cases, Conventional Implantology, EL – Esthetic Line, Full arch, Peng Dong

Doctor Peng Dong, the expert of tooth implantation in Peking University International Hospital and president of Beijing Hedu Stomatological Clinic Co., Ltd

Medical Case Report

Sex / Age: Male/47  
First Visit: 02/07/2015 Implant Surgery: 08/08/2015 / 18/09
Others Surgery (GBR…):08/08/2015 / 18/09 Final Restoration: 18/06/2016
First Recall: 29/06/2016  
Chief Complaint: The upper jaw teeth has come loose and requires treatment.
Consideration(s):Immediate Implantation + Immediate Loading + GBR

CASE OUTLINE

Upper Jaw: Teeth 8, 2 on the right side, and teeth 1, 2, 8 on the left side exhibit severe mobility ranging from Grade II to Grade III. Additionally, teeth 5, 4, 3 on the right side, and teeth 3, 4, 5 on the left side show varying degrees of gingival recession with mobility ranging from Grade I to Grade II. Following extraction, an immediate implantation procedure will be performed using C-Tech dental implants of models EL-3511, EL-4311, and EL5111, totalling 8 implants in the upper jaw. Lower Jaw: Teeth 3, 4, 5 on the right side, and teeth 4, 5 on the left side show gingival recession with mobility ranging from Grade I to Grade II. Following extraction, an immediate implantation procedure will be performed using C-Tech dental implants of models EL-4311, EL5109, and EL5111, totalling 6 implants in the lower jaw. Subsequent restoration will involve the use of zirconia full crown bridges.

TREATMENT PLAN

Upper Jaw: Teeth 2, 3, 5, 6 show ideal alveolar bone width and height. After the affected teeth are extracted, immediate implantation will be performed using C-Tech dental implants of models EL-3511, EL-4311, and EL-5111, totalling 8 implants. These implants will provide support for fixed temporary denture restoration. One month later, perform treatment for the lower jaw. Lower Jaw: Teeth 3, 4, 6 show ideal alveolar bone width and height. After extracting the affected teeth, immediate implantation will be performed using C-Tech dental implants of models EL-4311, EL5109, and EL5111, totalling 6 implants. These implants will provide support for fixed temporary denture restoration.

TREATMENT

Upper Jaw Implant Surgery
1. Perform standard disinfection and drape the area with cloths. Administer painless local infiltration anesthesia for the entire upper dental arch. Temporarily retain tooth 8 on the right side.
2. Make incisions along the alveolar ridge from left upper tooth 7 to right upper tooth 7, and in the sulcus of teeth 5, 4, 3, 2 on the right side and teeth 3, 4, 5 on the left side. Gently reflect the flap. Extract the affected teeth. Use bone forceps to remove the alveolar bone septum and a large round bur to smooth the bone surface.
3. Fix teeth 6 on both the right and left side, and drill progressive preparation holes to a depth of 4.7*13mm. Implant C-Tech dental implants of size 5.1*11mm in all these locations. The torque on the left upper 6 implant is insufficient. Fix teeth 5, 3, 2 on the right side and teeth 2, 3, 5 on the left side, and drill progressive preparation holes to a depth of 2.8*13mm for the teeth 2 on both left and right side. Implant C-Tech dental implants of model EL-3511 in these locations. Drill progressive preparation holes to a depth of 3.7*13mm for teeth 3, 5 on the right and left sides, and implant C-Tech dental implants of model EL-4311 in these locations. Utilize implants on teeth 6, 5, 3, 2 on the right side and teeth 2, 3, 5 on the left side to install Peek temporary abutments. For the left upper 6, use a cover screw. Cover the alveolar ridge of the left upper 6 and the bone gap between right upper 3 and 4 with bone powder, and cover with membrane. Securely suture the area.
4. Fabricate temporary dentures using the upper full denture and implants on teeth 6, 5, 3, 2 on the right side and teeth 2, 3, 5 on the left side. Adjust the occlusion.

Lower Jaw Implant Surgery
Perform standard disinfection and drape the area with cloths on the left tooth 1. Administer painless local infiltration anesthesia for the entire lower dental arch.
1. Make incisions along the alveolar ridge from left 7 to right 7, and in the sulcus of teeth 5, 4, 3 on the right side and teeth 4, 5 on the left side. Reflect the flap. Extract the affected teeth and use bone rongeurs to remove the thin sharp alveolar ridge edge. Use a round bur to smooth the bone surface.
2. Fix tooth 6 on the left side and drill a pilot hole to the working length. Then, use an expanding drill to progressively prepare the hole to a depth of 4.7*12mm. Implant C-Tech dental implant model EL-5111 with a Peek abutment of size Φ4.5H3, applying a torque force of 60N. The marginal bone height is measured at M1D1B0.5L0.5. Drill progressive preparation holes to a depth of 3.7*13mm for teeth 3, 4 on the left and right sides, and implant C-Tech dental implants of model EL-4311. For tooth 4 on the left side, use a cover screw with a torque force of 20N. The marginal bone height is measured at M2D2B1L2. Use a Peek abutment of size Φ4.5H3 with a torque force of 60N for tooth 3 on the left side, with a marginal bone height of M0.5D0.5B0.5L0.5. Use a Peek abutment of size Φ4.5H3 with a torque force of 60N for tooth 3 on the right side, with a marginal bone height of M1.5D1.5B0.5L1.

Use a cover screw with a torque force of 20N for tooth 4 on the right side, with a marginal bone height of M1.5D1.5B1L1.5. Fix tooth 6 on the right side and drill progressive preparation holes to a depth of 4.7*11mm. Implant C-Tech dental implant model EL-5109 with a Peek abutment of size Φ4.5H3, applying a torque force of 60N. The marginal bone height is measured at M-0.5D-1B0L-0.5. Implant bone powder and membrane for teeth 3, 4 on the left and right sides, and teeth 4, 6 on the right side. Close the wound with meticulous suturing and apply pressure to stop bleeding.
3. Utilize implants on teeth 3, 6 on the right and left sides to fabricate an immediate overdenture for the lower jaw. Adjust the occlusion.
4. After 10 months, take an impression, replace the restoration abutments, fix them with adhesive bonding, and provide permanent restoration with zirconia porcelain crowns.

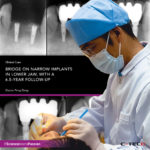
Bridge on Narrow implants in lower jaw, 6.5-year follow-up

Written by feRKzzCTo0 on . Posted in Bone Regeneration, Clinical cases, Conventional Implantology, EL – Esthetic Line, Peng Dong

Doctor Peng Dong, the expert of tooth implantation in Peking University International Hospital and president of Beijing Hedu Stomatological Clinic Co., Ltd

Medical Case Report

Sex / Age: Male/76  
First Visit: 07/05/2015 Implant Surgery: 18/09/2015
Others Surgery (GBR…):18/09/2015 Final Restoration: 05/03/2016
First Recall: 24/03/2016  
Chief Complaint: Missing a lower anterior teeth, the patient seeks implant restoration.
Consideration(s):GBR

CASE OUTLINE

The lower teeth 2, 1, 1 and 2 were extracted due to looseness three months ago. The patient is in good health with no other surgical contraindications. Oral examination: Lower teeth 2 and 2 (lower left central incisor and lower left lateral incisor) are missing, with significant alveolar bone resorption, and the mucosa shows no signs of redness or swelling. Teeth 3 in the lower left and lower right regions, as well as teeth 2 in the upper jaw, are free from caries, not loose, and the gums show no signs of redness or swelling. The upper and lower front teeth exhibit a deep overbite of Class II. Overall oral hygiene is good (one week after periodontal scaling), with no calculus, stains, or soft plaque. Significant gum recession is evident. CT scan shows that the width of the alveolar bone for tooth 2 in the lower right region is 5.0mm, with a bone height of 15.2mm, and for tooth 2 in the lower left region is 4.5mm, with a bone height of 15.8mm.

TREATMENT PLAN

For both lower right and lower left teeth 2, conventional implantation of C-Tech implants (Model: ND-3009) will be performed, along with simple bone grafting during the same procedure. After five months, impressions will be taken, and an oxidized zirconia porcelain bridge will be permanently placed for final restoration.

TREATMENT

1、Collect blood before the surgery to prepare CGF.
2、Under routine electrocardiographic monitoring, place disinfectant towels in the lower right and lower left quadrant. Administer painless local anesthesia to the areas. Make incisions along the crest of the alveolar ridge for lower teeth 4, and additional incisions inside the grooves for lower teeth 3. Carefully reflect the gingiva, observing significant alveolar bone resorption. Use large round burrs to smooth the bone surface.
3、Precisely position the C-Tech implants (Model: ND-3009) in the lower right and lower left teeth 2. Use a pilot drill to reach the working length and gradually create tapered boreholes measuring 2.6*13.0mm. Implant the C-Tech implants and secure with closure screws, applying a torque of 20N for each. Cover the implants in the lower right and lower left regions with bone graft, membrane, and CGF membrane on the buccal side. Suture the site tightly, and apply sterile gauze rolls for hemostasis. Instruct the patient on post-operative care, including a 5-day course of oral antibiotics and rinsing with chlorhexidine mouthwash four times daily for two weeks.
4、Remove sutures after 10 days, confirming good wound healing with minimal redness and swelling in the soft tissues and presence of some soft plaque.
5、After 5 months, take impressions, and replace the abutments with Model ND-3025-2*2. Cement and fix the oxidized zirconia porcelain bridge permanently for final restoration.

DISCUSSION

1、The patient is satisfied with the current condition of their teeth, and the dentures function and appear excellent.
2、There is no pain, abnormal sensation, infection, or damage observed after the implantation.
3、During the clinical observation period, there was no evidence of gum recession.
4、X-ray findings show that the bone resorption around the neck of the implants in lower right 2 and lower left 2 during the observation period is less than 0.2mm.

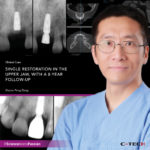
Single restoration in the upper jaw, 8-year follow-up

Written by feRKzzCTo0 on . Posted in Bone Regeneration, Clinical cases, Conventional Implantology, EL – Esthetic Line, Peng Dong

Doctor Peng Dong, the expert of tooth implantation in Peking University International Hospital and president of Beijing Hedu Stomatological Clinic Co., Ltd

Medical Case Report

Sex / Age: Female/55  
First Visit: 16/01/2014 Implant Surgery: 21/02/2014
Others Surgery (GBR…):21/02/2014 Final Restoration: 13/09/2014
First Recall: 16/01/2014  
Chief Complaint: Missing an upper anterior tooth, the patient seeks implant restoration.
Consideration(s):Immediate Implantation + GBR

CASE OUTLINE

The crown on the upper left tooth 1 became loose and was subsequently extracted. Immediately after the extraction, a C-Tech implant (Model: EL-4311) was placed. A follow-up treatment with an oxidized zirconia porcelain crown is planned for restoration.

TREATMENT PLAN

The width of the alveolar ridge in the upper left tooth 1 region measures 9.17mm, with a bone height of 13.5mm. After extraction, an immediate C-Tech implant (Model: EL-4311) will be placed. Simultaneously, a guided bone regeneration procedure will be performed, followed by the fabrication of a temporary removable denture for interim restoration.

TREATMENT

1、Collect 20ml of venous blood to prepare Concentrated Growth Factor (CGF) for future use.
2、Perform standard disinfection and drape the area with cloths. Administer local anesthesia to the treatment area, ensuring minimal discomfort. Make a minimally invasive incision along the groove of the upper left tooth 1. Gently extract the affected tooth with intact roots and thoroughly clean and scrape the wound.
3、Precisely position the C-Tech implant (Model: EL-4311) in the location of the upper left tooth 1. Use pilot drills to reach the working length and gradually prepare the borehole to 3.7*13mm (near the centre). Implant the C-Tech implant (EL-4311) with a closure screw, applying a torque of 45N. Place bone graft material on the lip side where bone loss is present. Cover it with membrane and suture the wound with reduced tension, ensuring proper closure.
4、After 6 months, take an impression and replace the restorative abutment with Model: EL-4503F. Permanently fix it with adhesive fixation, and apply an oxidized zirconia porcelain crown for long-lasting restoration.

Prefooter ENG